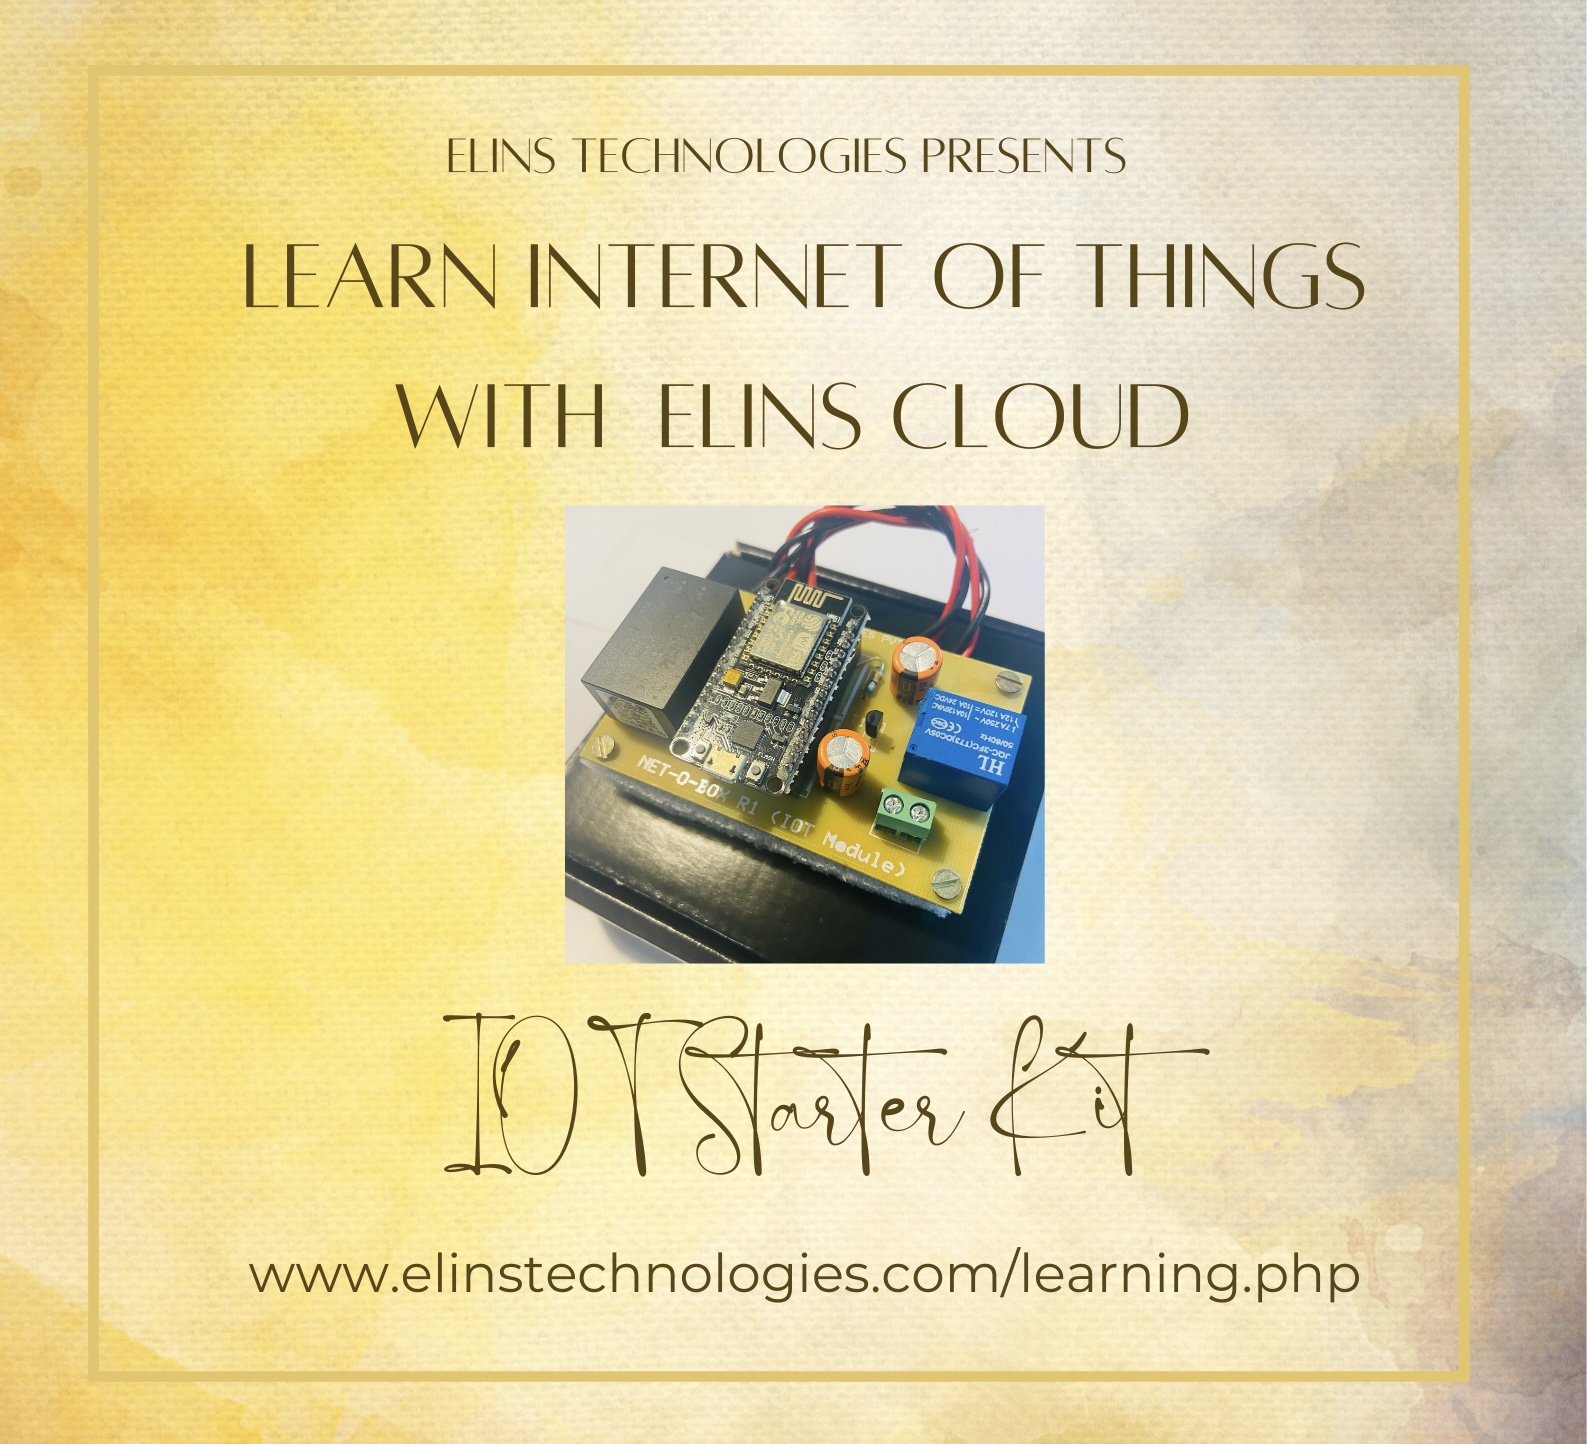
Control of Industrial Devices & Home Appliances using
Elins IOT Cloud Server

___________________________________________________________________________________________________________________
#1 ARDUINO IDE DOWNLOAD
In order to start with IOT Learning Kit, we required a arduino software to code NodeMCU.
For downloading follow below steps:
Step1: Go to google page and search "Arduino download".
Step2: Now click on "Arduino IDE download".
Tutorial IOT Learning Kit | Video 1: Arduino IDE Download | Elins Technologies
Step3: On this page select download option as per your operating system.
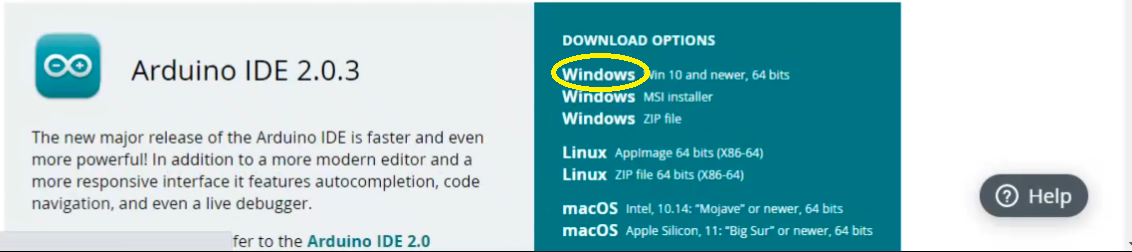
Step4: Click on "Just Download".
Step5: when download is completed you can click and install the software.
___________________________________________________________________________________________________________________
#2 NODEMCU SETUP
Arduino IDE is required to configure so that NodeMCU can be coded with it. Follow the steps below for configuring Arduino IDE:
Step1: Open Arduino IDE. Now go to File -> Preferences ->
in "Addional Board Manager URLs", paste this link and click OK:
http://arduino.esp8266.com/stable/package_esp8266com_index.json

Tutorial IOT Learning Kit | Video 2: NodeMCU Setup | Elins Technologies
Step2: Now click on tools then Board Manager.
Step3: This window will open and it will take little time to download the index.
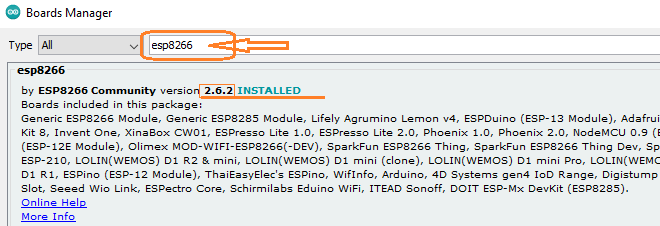
Step4: Now in the search, type "esp8266".
Step5: ESP8266 Community library will come. Now click on this library.
Step6: Select the "version 2.6.2" and install it.
Step7: Now wait, it will take some time to install the library.
Step8: After installation, "installed" will be written here.
Step9: Now close the window.
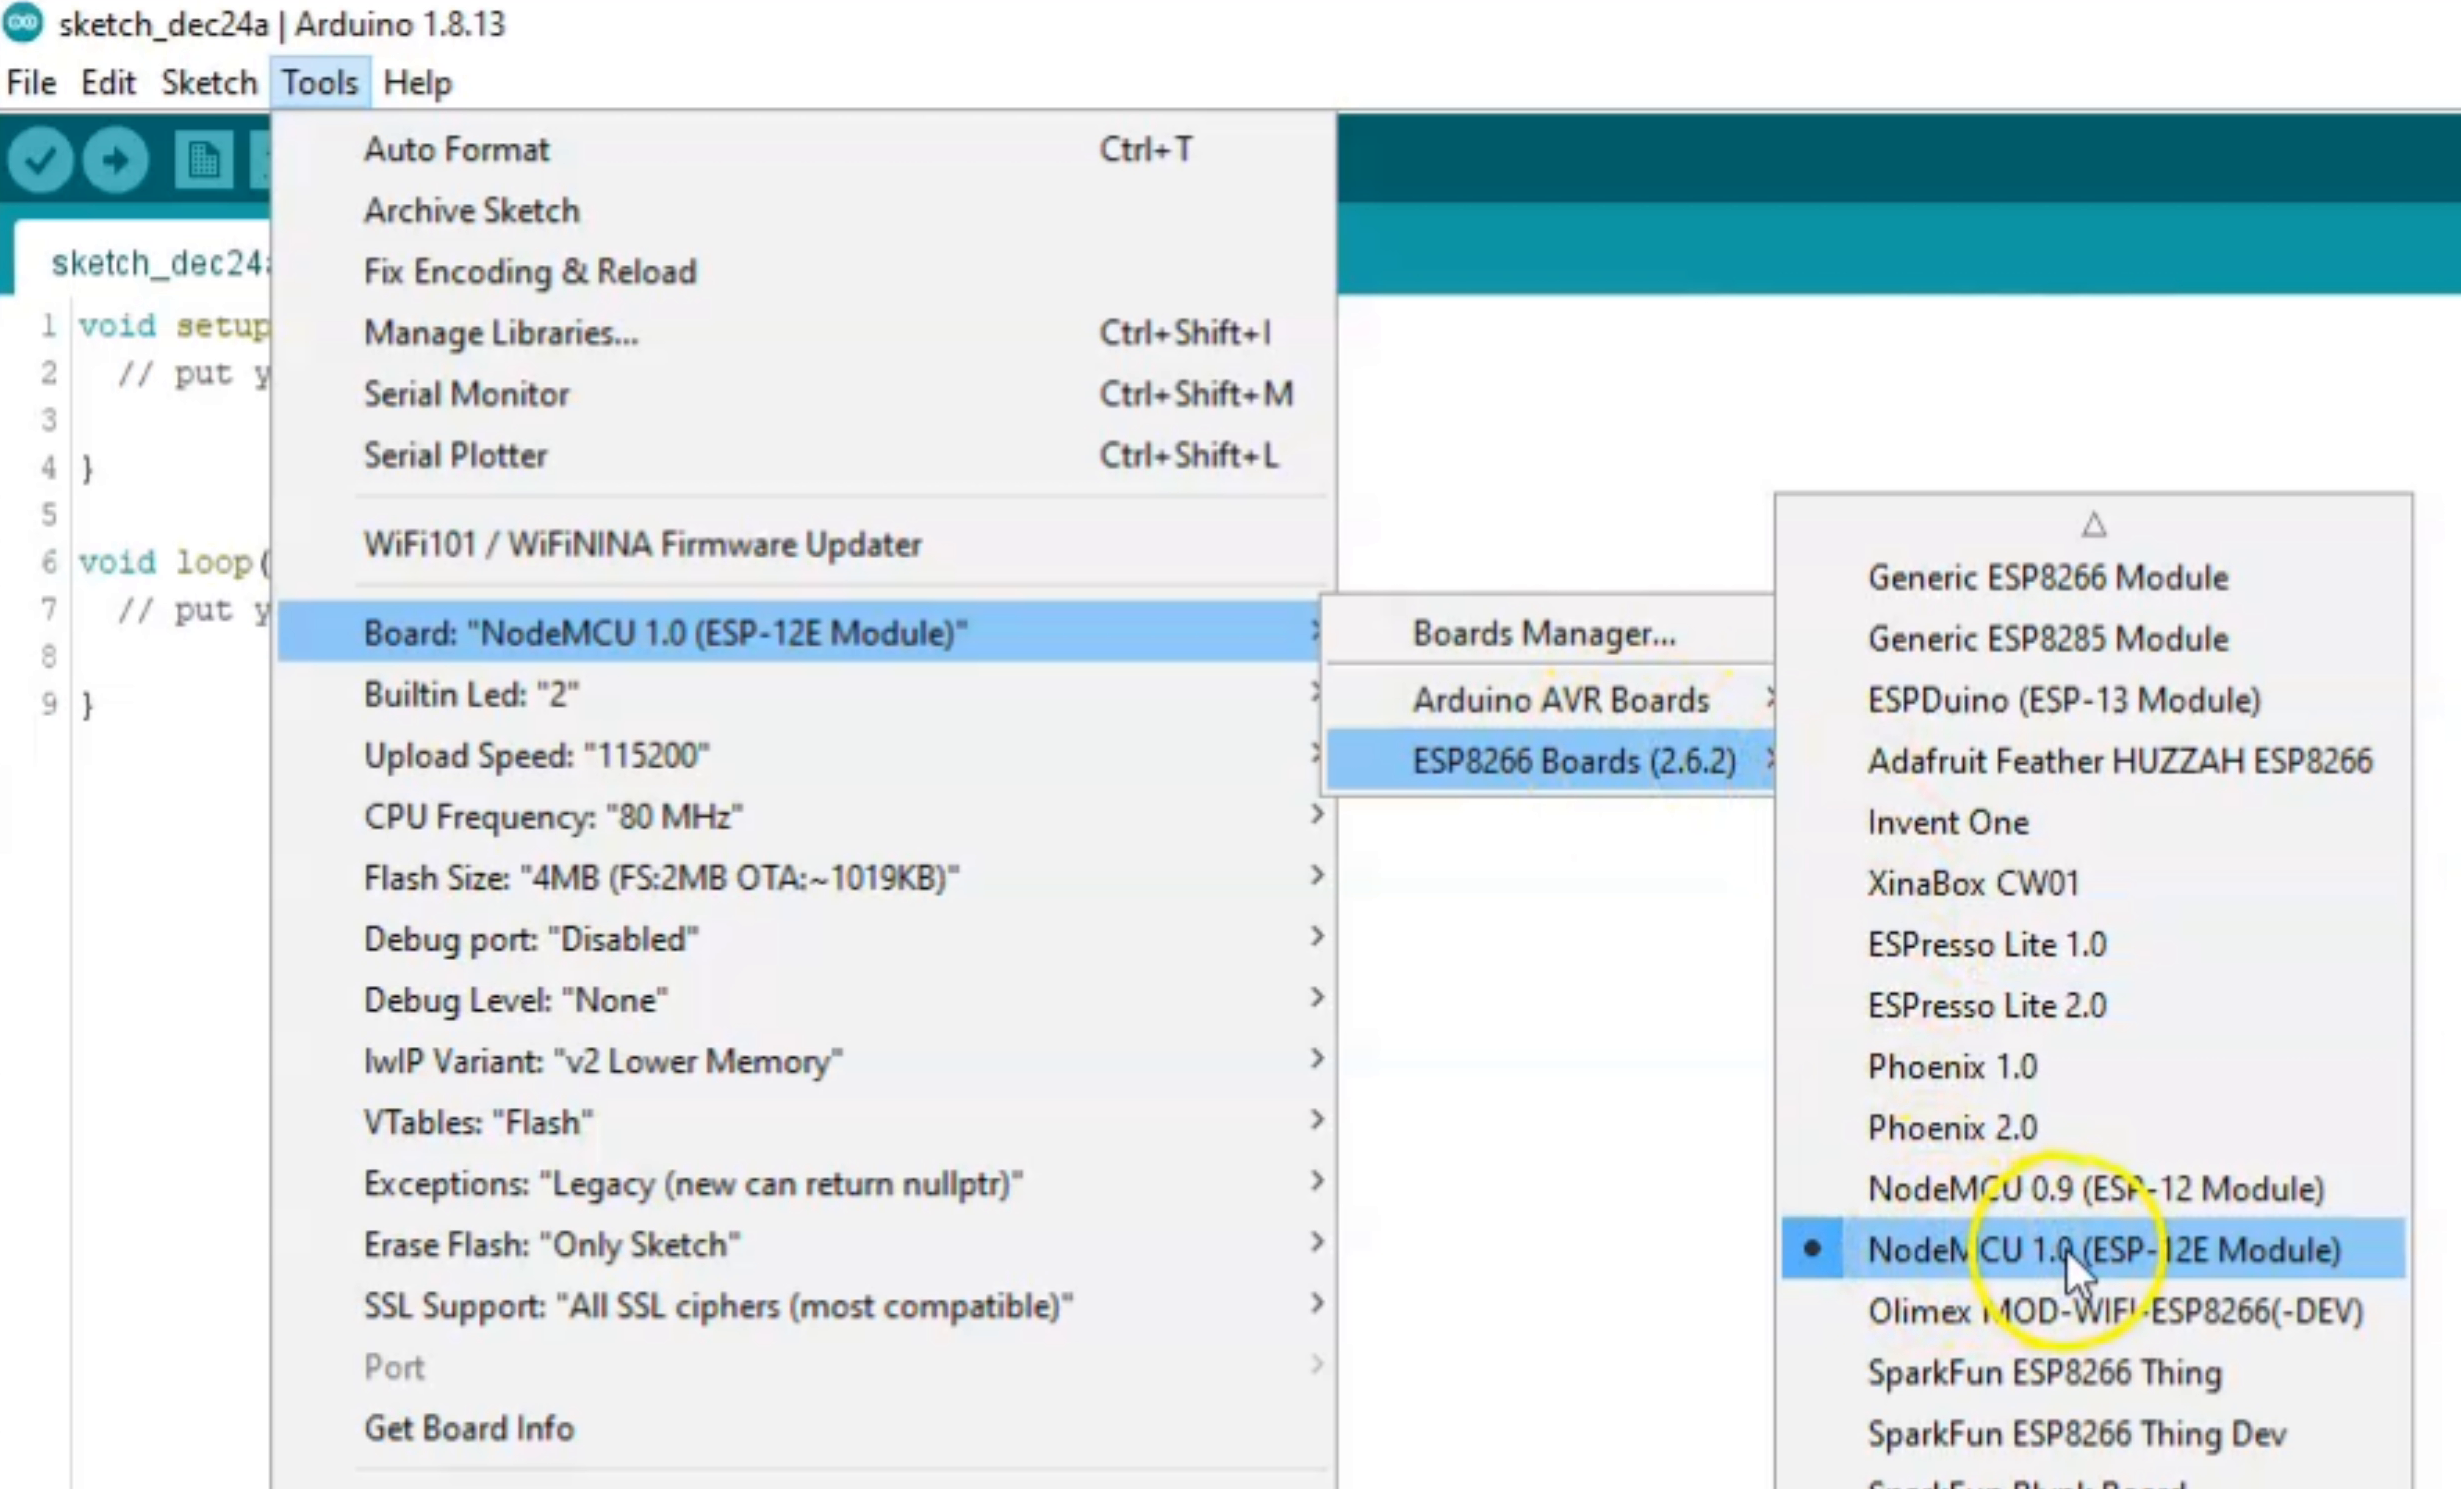
Step10: Now go to tools then "Board" then esp8266 boards and select "NodeMCU 1.0 (ESP-12E Module)".
Step11: Now again go to tools and verify your board it should be "NodeMCU 1.0" that's it.
Now NodeMCU Setup is completed.
___________________________________________________________________________________________________________________
#3 HARDWARE EXPLAIN
Let us discuss IOT Learning Kit. In this section, hardware and wire connections are discussed. Check the following steps
for HOW TO MAKE CONNECTIONS?
Tutorial IOT Learning Kit | Video 3: Hardware Explain | Elins Technologies|
Step1: This is IOT Learning Kit based on NodeMCU.
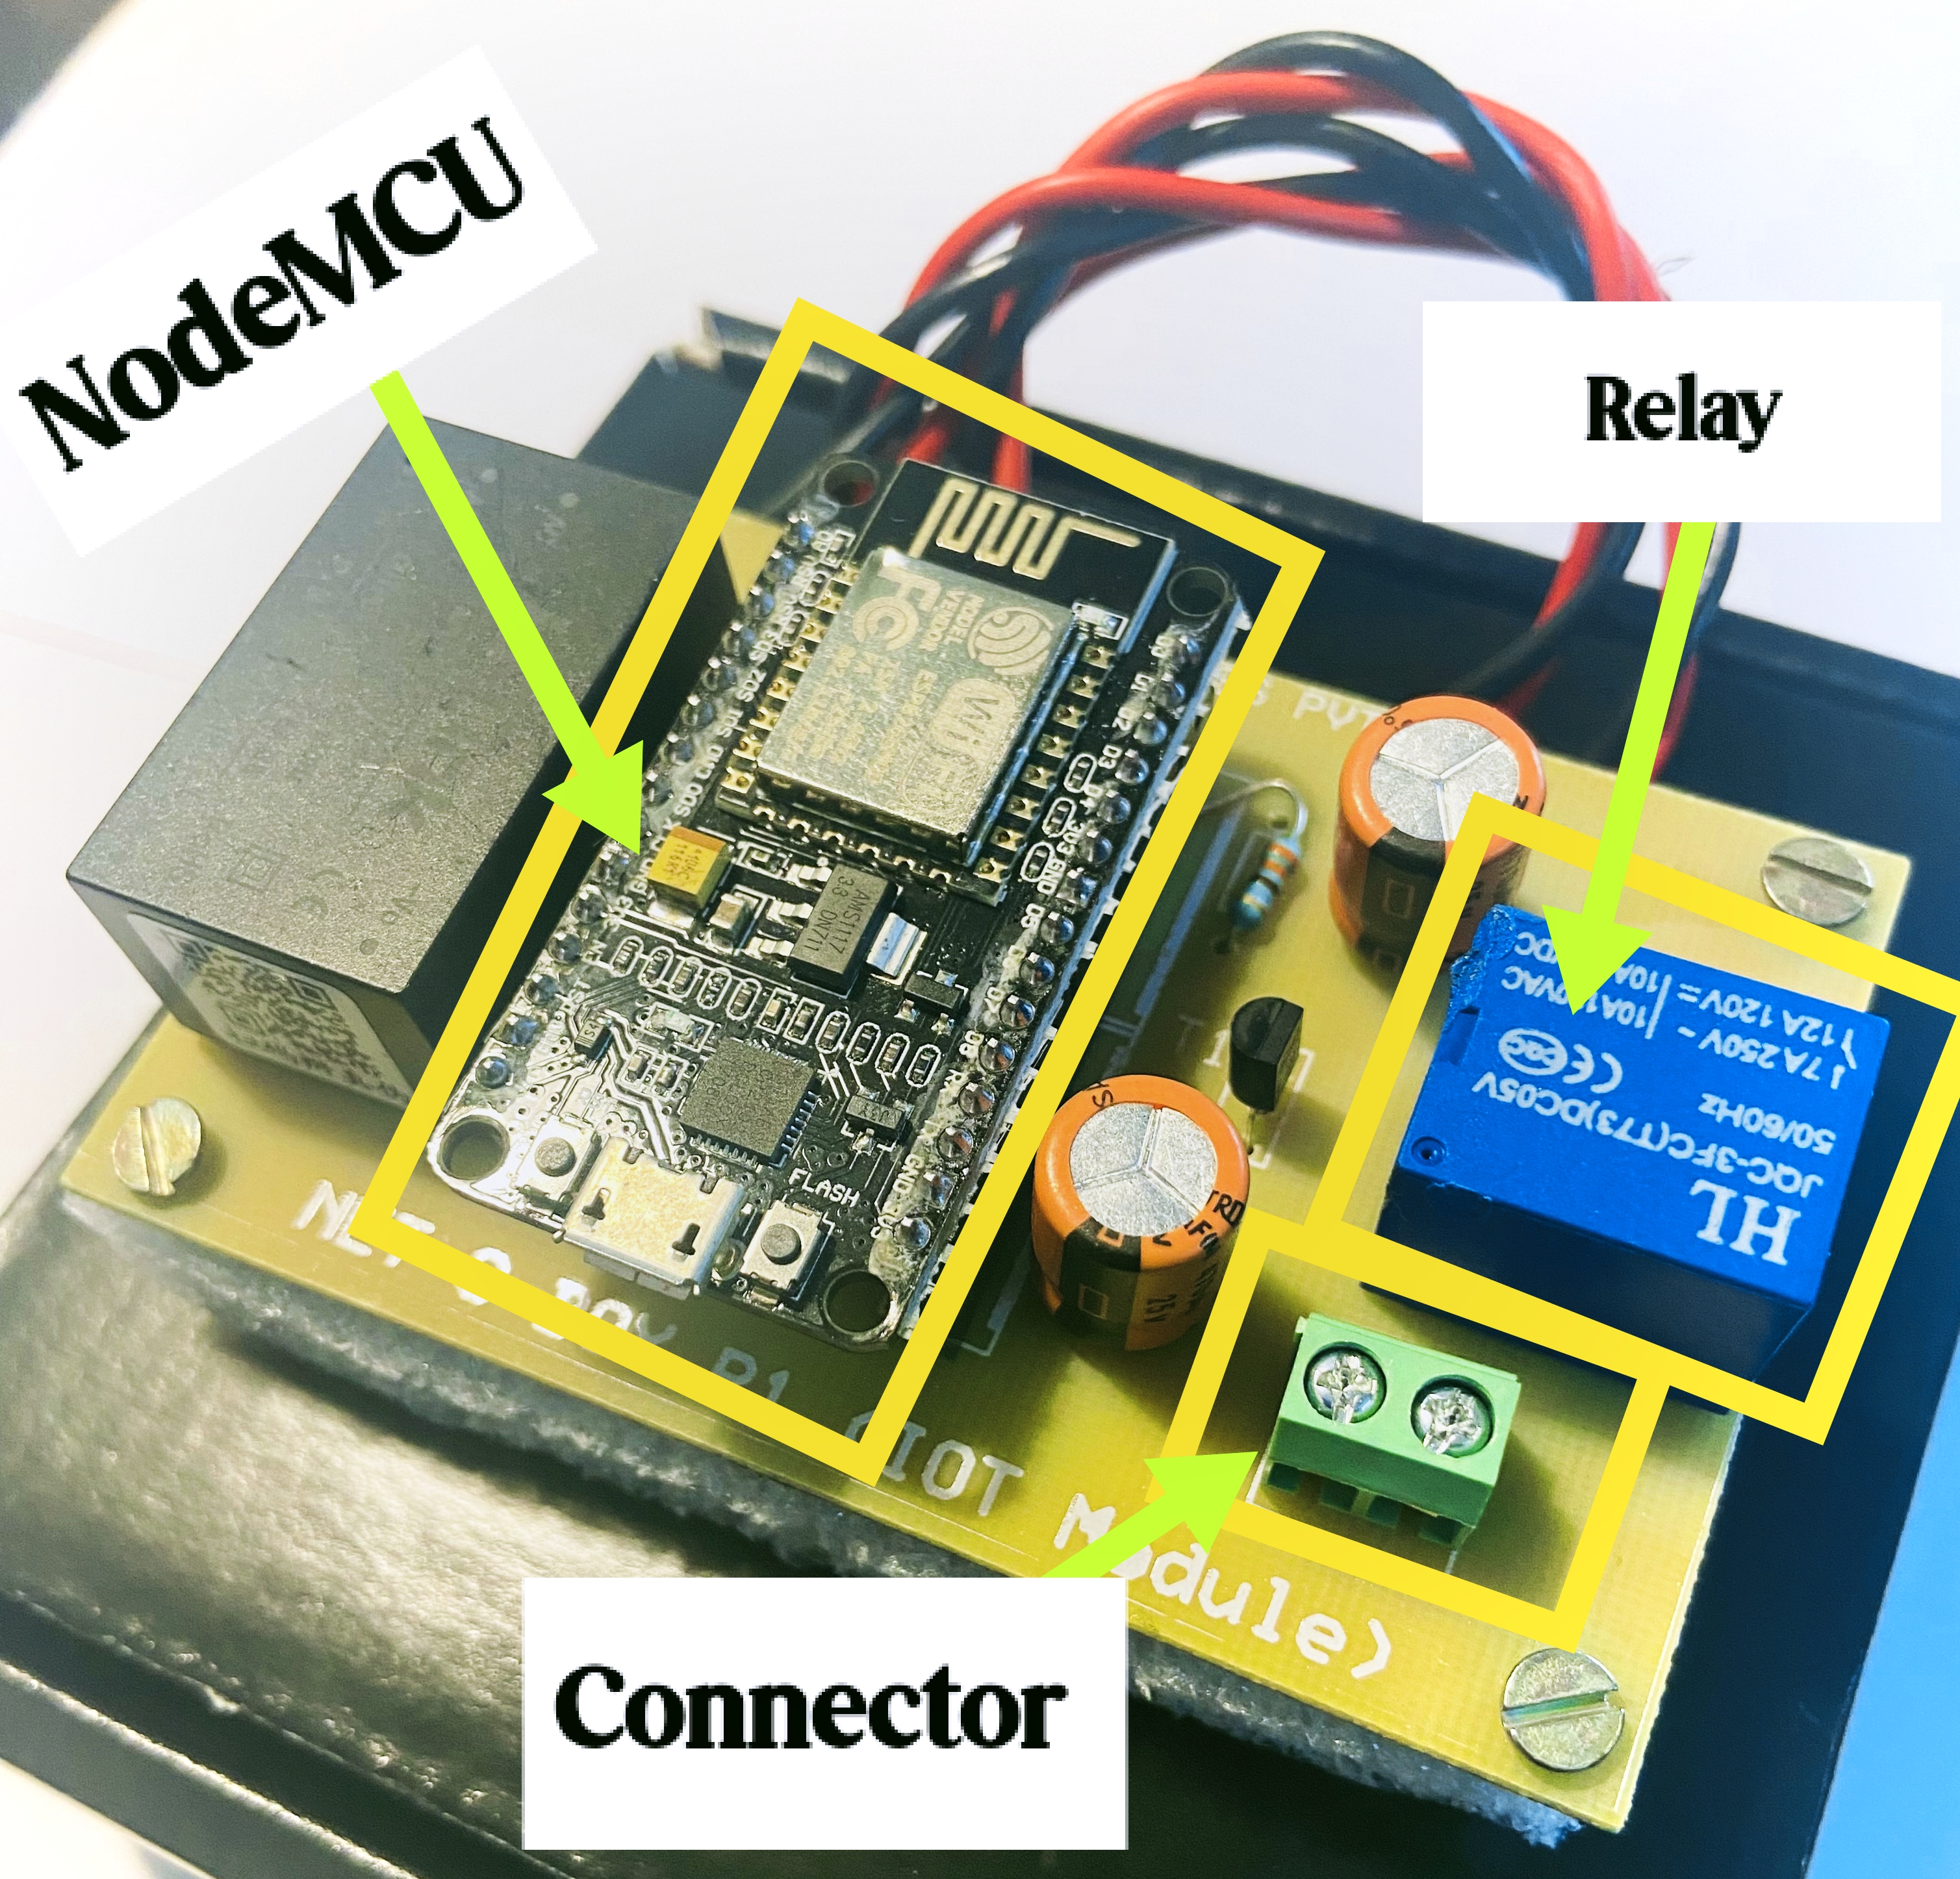
IOT Learning Kit
Step4: Here we have the Relay to control AC devices and this green one the power connector.
Step5: The AC device which you want to switch, connect its wire with this power connector.
Step6: Now make the connections as shown in above video.
Step7: now connect this device with the mains as shown.
Step8: Now wait till this blue LED start blinking.
Step9: Now it shows that it is connected with internet and ready to use.
___________________________________________________________________________________________________________________
#4 Cloud Registration and IOT Web Panel
Elins Technolgies is providing cloud services to create IIOT based applications. These services are free, in order to use these services, register on Elins Cloud Server page as discussed in steps below:
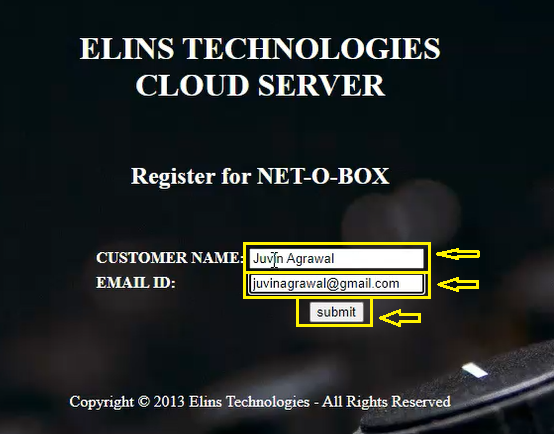
Step1: Click on this icon to register :

Step2: For Registration enter your "Name" and your "email ID".
Step3: Click on "Submit" button.
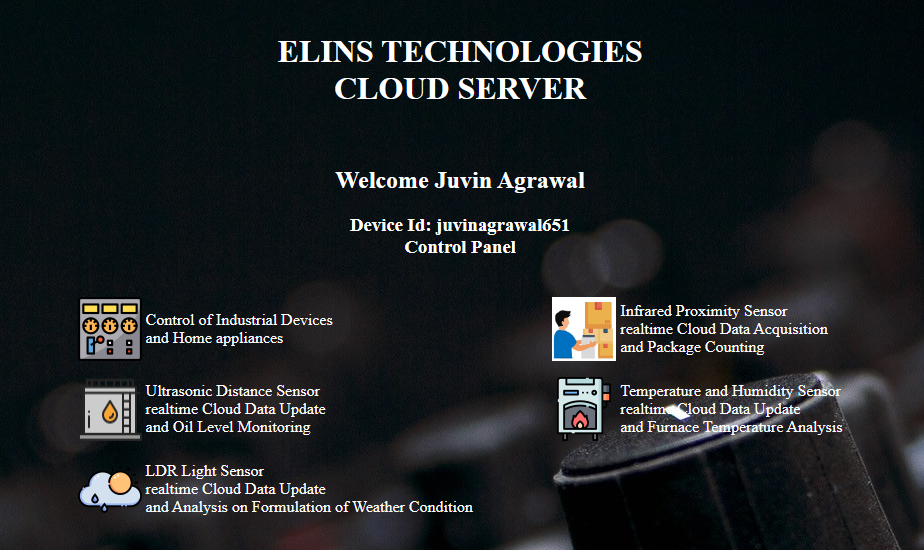
This is Services page of Elins Cloud Server. Here You can select which Sensor based IIOT Ecosystem Service you wants to use, on this page, you can click on any Icon to open its IIOT Web Panel:
Watch this Video to see the Registration Process:
If you are already Registered User then Login directly through process explained below:
Step1: Click on this icon to Login :

Step2: For Login enter your "Id" which you have recieved after Registration.
Step3: Click on "Submit" button.
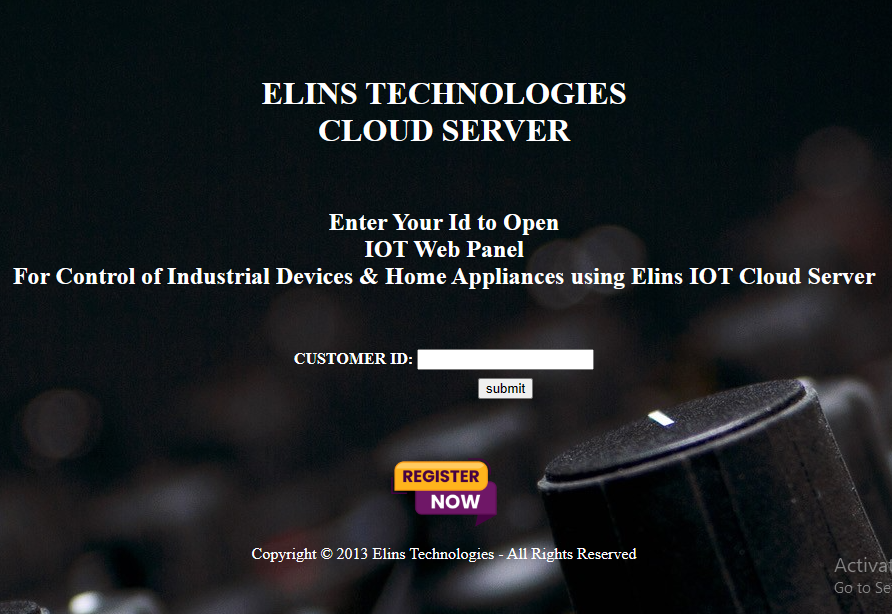
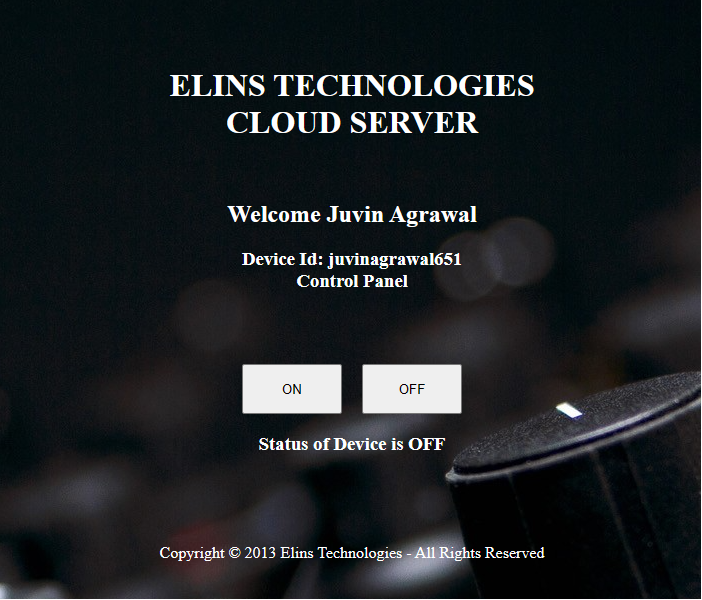
This is IIOT Web Panel for Control of Industrial Devices & Home Appliances in Real-Time using Elins IOT Cloud Server
:
Watch this Video to see the Login process:
___________________________________________________________________________________________________________________
#5 CODE EXPLAIN
NodeMCU required a code to communicate with the cloud server. Let us discuss this code in detail.
Cloud Arduino code: elins_edu_code1.zip, Download it from link below:
Unzip the file and open the .INO file
Tutorial IOT Learning Kit | Video 5: Code Explain | Elins Technologies
This is the Code of NodeMCU to communicate with Elins Cloud Server.
#include < Arduino.h >
#include < ESP8266HTTPClient.h >
#include < ESP8266WiFi.h >
const char* ssid = "*********"; // PUT SSID OF YOUR WIFI HERE
const char* password = "************"; // PUT PASSWORD OF YOUR WIFI HERE
void setup()
{
delay(5000);
Serial.begin(9600); // INITIALIZE UART SERIAL MONITOR TO DISPLAY EVENTS
pinMode(D0,OUTPUT); // DECLARE PIN D0 AS OUTPUT PIN - ON BOARD LED
pinMode(D1,OUTPUT); // DECLARE PIN D1 AS OUTPUT PIN - RELAY IS CONNECTED WITH IT
digitalWrite(D0,0); // INITIALIZE PIN D0 WITH 0 - ON ONBOARD LED
digitalWrite(D1,0); // INITIALIZE PIN D1 WITH 0 - OFF RELAY
Serial.println();
Serial.println();
Serial.println();
WiFi.begin(ssid,password); // START WIFI CONNECTION WITH SSID PASSWORD
Serial.print("[CONNECTING] WAIT ...");
while (WiFi.status() != WL_CONNECTED) // WAIT TILL WIFI IS CONNECTED
{
delay(100);
Serial.print(".");
}
Serial.println("WIFI CONNECTED SUCCESSFULLY");
}
String payload="";
String DeviceId="************"; // CHANGE IT WITH DEVICE ID RECEIVED FROM CLOUD
HTTPClient http;
void loop()
{
if(WiFi.status() == WL_CONNECTED)
{
String URL = "";
URL = URL + "http://elinstechnologies.com/netobox_v1/http_device.php?id=" + DeviceId; // CLOUD URL
http.begin(URL); // MAKE HTTP CONNECTION WITH CLOUD
http.addHeader("Content-Type", "application/x-www-form-urlencoded"); // SPECIFY CONTENT-TYPE HEADER
int httpCode = http.GET(); // SEND HTTP GET REQUEST TO CLOUD
payload = http.getString(); // RESPONSE FROM CLOUD
Serial.println(payload); // PRINT PAYLOAD
http.end(); // Close connection
if(payload.equals("ON")) // PAYLOAD = ON, RELAY ON
{
digitalWrite(D1,1);
}
else if(payload.equals("OFF")) // PAYLOAD = OFF, RELAY OFF
{
digitalWrite(D1,0);
}
// BLINK LED TO INDICATE ONE CYCLE OF HTTP REQUEST
digitalWrite(D0,1);
delay(500);
digitalWrite(D0,0);
delay(500);
digitalWrite(D0,1);
delay(500);
digitalWrite(D0,0);
delay(3000);
}
delay(500);
// END OF CODE
}
To Understand this code, please refer this video Tutorial IOT Learning Kit | Video 5: Code Explain | Elins Technologies above.
___________________________________________________________________________________________________________________
#6 WORKING DEMO
We have completed following steps upto now:
# Elins Cloud Registration (Got Control page from it).
# Cloud Arduino Device Code (NodeMCU is ready and communicating with Elins Cloud)
Now Let us RUN the complete IOT Ecosystem all together. For this follow the steps below:
Step1: Copy paste that CLoud Control Page URL to open this control panel.
Step2: Device LED is blinking, it means device connected with internet.
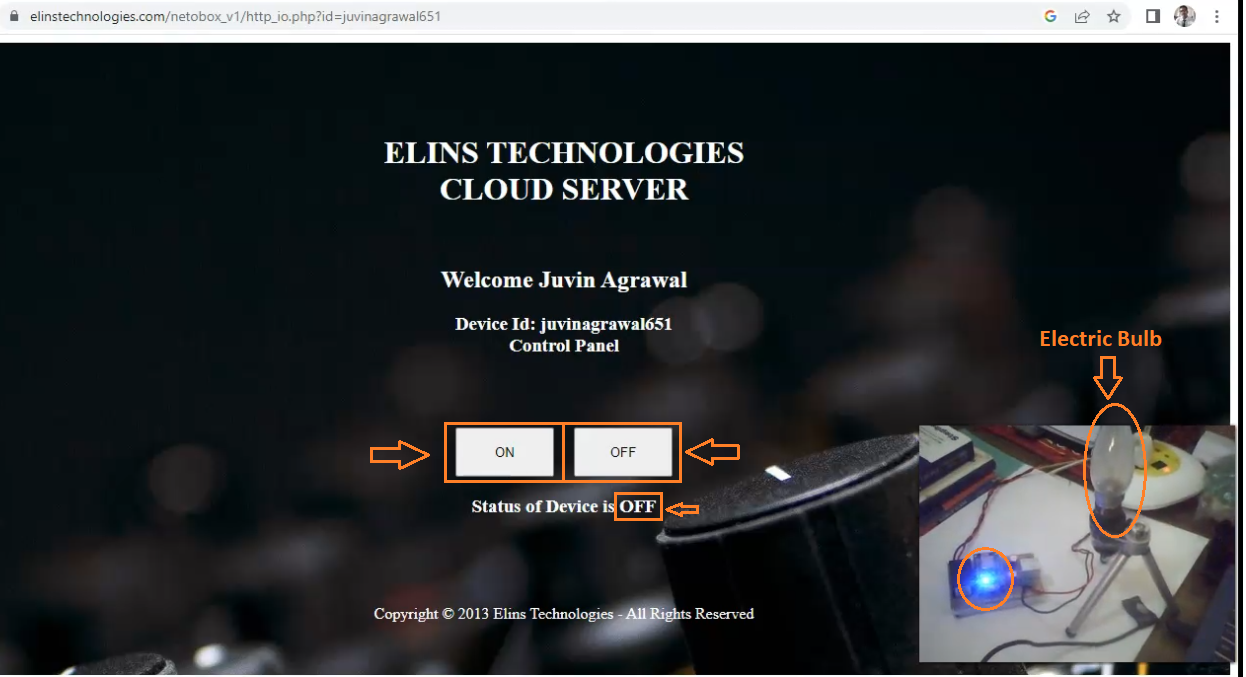
Step3: This is elecric bulb, we have connected with this device.
Tutorial IOT Learning Kit | Video 6: Working Demo | Elins Technologies
Step4: Now click on to "ON" the device.
Step5: Now click off to "OFF" the device.
Step6: So in this way you can control any electrical device by using this control panel.
For next tutorial, Click NEXT.

We hope you enjoyed and learn properly how to create
complete IOT Ecosystem.
for any doubt or query email us at info@elinstechnologies.com
or Whatsapp us

# IOT LEARNING KIT
IOT Learning Kit is a development board based on NodeMCU. IOT Learning Kit Includes:
1. NodeMCU.
2. NodeMCU Board with Relay.
3. Extension Board.
4. DHT11 Temperature and Humidity Sensor.
5. Infrared Sensor.
6. SR04 Ultrasonic Sensor.
7. LDR Sensor
Actual Price : Rs.2999
For Now : Rs.1999 Only
Free Delivery
For Details: Whatsapp at +91-8750853539